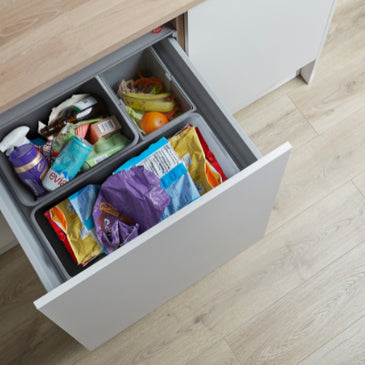
Tips and Tricks for Installing the Wesco Pullboy Z BIG Waste Bins
Installing the Wesco Pullboy Z BIG waste bins can significantly enhance the functionality and efficiency of your kitchen. Designed for large-capacity waste management, these bins are perfect for busy households or commercial kitchens. To ensure a smooth installation process, follow these expert tips and tricks.
Check Cabinet Compatibility
Before purchasing the Wesco Pullboy Z BIG, confirm that your cabinet has the necessary dimensions. These bins are designed for 600mm wide cabinets and require sufficient depth and height to accommodate the bin system. The minimum internal cabinet depth should be 503mm, and the internal height should be at least 603mm. Ensure your cabinet walls are between 16mm - 19mm thick for correct installation. The Pullboy Z can be used with a framed style door but don’t forget to order the additional brackets to adjust where the front fixing points will sit.
Prepare Your Tools and Workspace
Gather the necessary tools, including:
· A drill with the appropriate bits
· A screwdriver (manual or electric)
· A measuring tape and pencil
· A level for precision
Clear out the cabinet space and ensure the surface is clean and free of obstructions.
Measure and Mark Accurately
Precision is key to a successful installation. Use a measuring tape to locate the correct mounting positions for the runners and front fixing brackets. The fitting guide provides detailed diagrams with specific measurements for drilling holes and positioning components. Mark these points clearly to avoid errors during drilling.
Secure the Rails Properly
The Pullboy Z BIG waste bin system operates on sturdy runners. When fixing the rails inside the cabinet, ensure they are level and parallel. Misaligned runners can cause the bins to operate improperly or create unnecessary friction. Refer to the fitting guide for detailed instructions on securing the rails and ensuring proper alignment.
Installing the Lid
The Pullboy Z BIG models feature a fixed lid that stays inside the cabinet. Make sure it is positioned correctly and does not obstruct the bin's movement. You’ll need the plastic long grey strips to create the ledge for the internal odour trap lid, snap off any additional length and fix them to the side of your cabinet.

Inserting the Frame
Step 2 of the Wesco instructions show how the frame needs to be adapted depending on the thickness of your cabinet walls (this is the thickness of the material used to build your cabinet). If your cabinet is 19mm then the small tab sections need to be bent up and if your cabinet is 16mm then leave them where they are.

Install the Front Panel Correctly
For a seamless look, the bin system integrates with your cabinet door. Align the front panel precisely to match the surrounding cabinetry. Use the adjustable fixing brackets to fine-tune the alignment for a flush finish. Don’t forget it you have a framed door to order the additional brackets!
Test the Pull-Out Mechanism
After securing all components, test the pull-out mechanism multiple times to check for smooth operation. If you experience resistance, recheck the alignment of the runners and brackets. The fitting guide offers troubleshooting tips in case of issues with the pull-out mechanism.
Enjoy Your Organised Waste Management System
With the Wesco Pullboy Z BIG successfully installed, you now have a high-capacity, efficient waste management solution that blends seamlessly into your kitchen. Regularly clean the bins and check the rail mechanism for long-term functionality.
By following these tips and consulting the fitting guide, you can achieve a professional-quality installation that enhances both convenience and kitchen hygiene. Happy installing!


